Connect a Postman API key to check your work
You do each step in Postman, then LiftOff uses your key to look at your workspace and confirm it's done. Connect once and it works for every module. Your key is saved in this browser and is only used to check your work in Postman.
Compare the optimized Fabric execution path with Direct, enforce a model policy without changing the support agent, inspect the operational evidence Fabric records, and explore adaptive routing across model configurations.
Test the Agent Before Enforcing the Token Limit
Before adding the token limit, capture a successful baseline so you can compare it with the governed result later.
- Confirm that you do not already have an enabled LLM Rate Limit instance on your LLM route. If you do, temporarily disable it.
- Return to the local support-agent UI and choose one supplied query. Keep this query unchanged—you will run it again after enabling the policy.
- Select Run comparison and confirm that both the Direct and Fabric Gateway lanes complete successfully.
- Confirm that Direct begins with 104 tools, while Fabric begins with only four: the three Tool Search discovery tools and the Fraud function.
- Compare the two completed runs. The exact values will vary, but Fabric should send far fewer tool-schema tokens, use less model context, consume fewer model tokens, and cost less to run.
- Record or leave the result open as your successful pre-policy baseline.
Expected outcome: Before the token limit is enabled, both lanes complete the same query successfully. Fabric begins with four tools instead of 104 and uses substantially fewer model resources than Direct.
Enforce an LLM Token Limit
The LLM Rate Limit plugin places a token budget around model traffic passing through a Fabric route. For this exercise, you will use a deliberately small budget so the policy is easy to trigger and observe.
- In Fabric's sidebar, select Policies → Plugin instances, then select New instance.
- Under Plugin, select LLM Rate Limit (
llm-rate-limit). - Enter a unique name such as
workshop-llm-token-limit. - Set Scope kind to Route and, under Scope name, select the LLM route you created in Part 3. The policy must be attached to the model route—not the combined MCP route—to govern model tokens.
- Under Configuration, enter:
- Max tokens:
10000 - Window (seconds):
60
- Max tokens:
- Expand Match conditions and status. Leave the match conditions empty so the policy applies to every request on the route, and confirm that the instance is Enabled.
- Select Save.
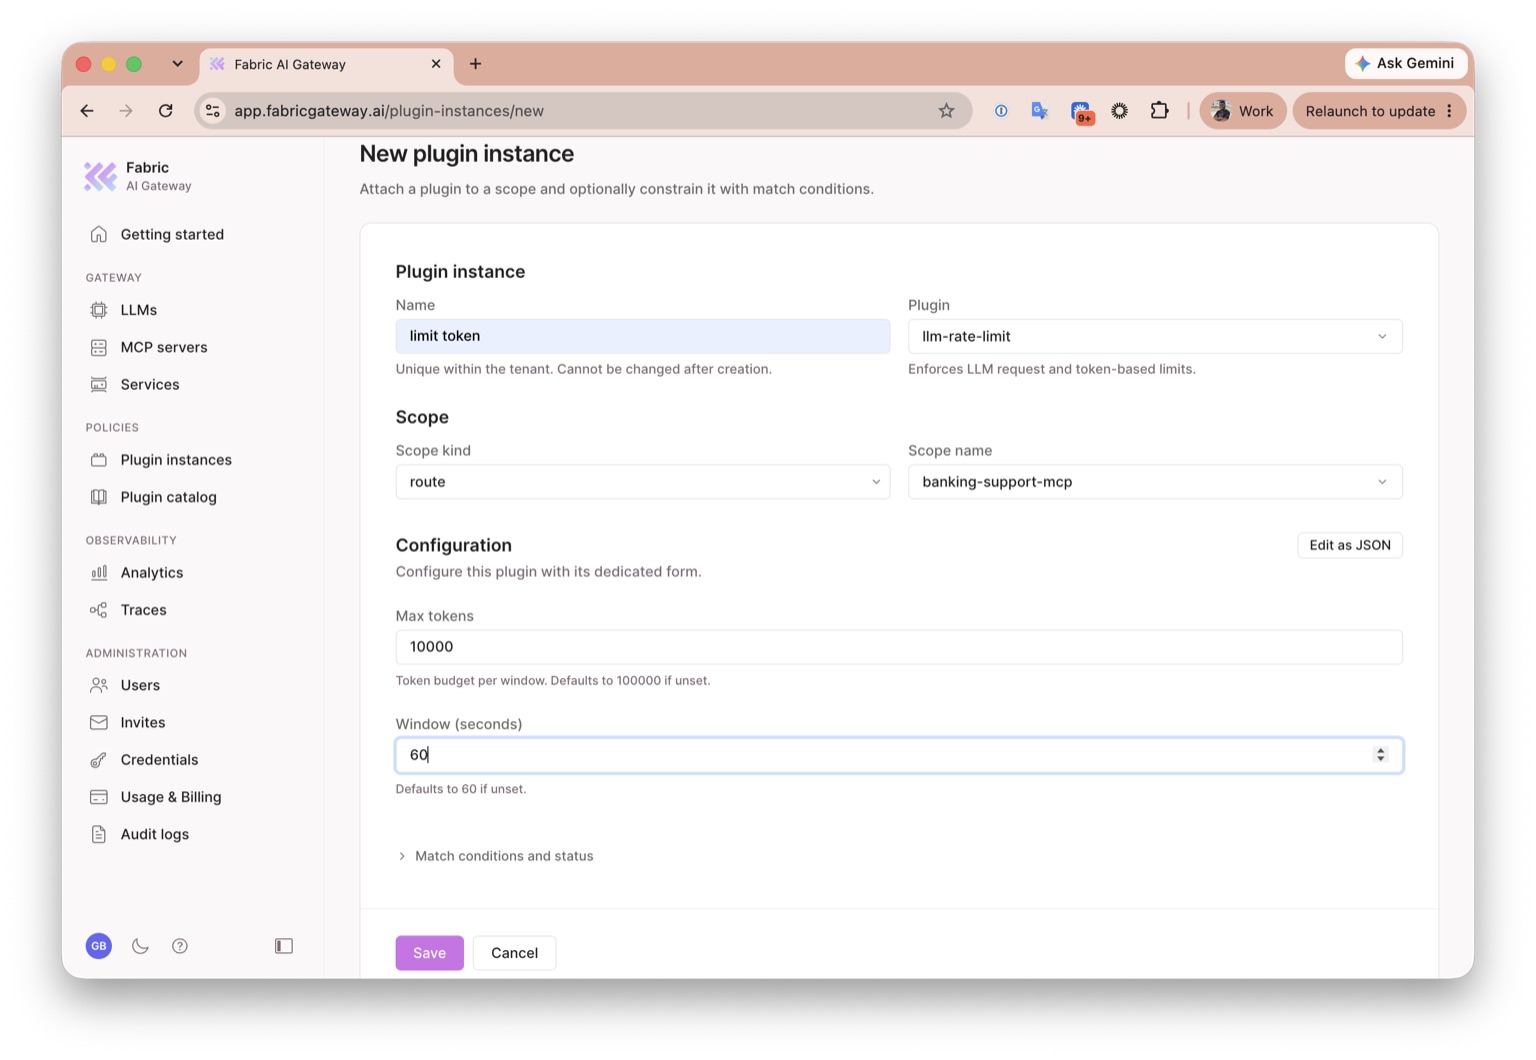
Expected outcome: Fabric now enforces a 10,000-token budget during each 60-second window for requests sent through your LLM route.
Test the Agent After Enforcing the Token Limit
- Return to the local support-agent UI and confirm that both Direct and Fabric Gateway report ready.
- Keep Return 429 on the first fraud assessment turned off. This exercise is testing the LLM policy, not the Fraud API's simulated retry behavior.
- Use the same query that completed successfully in Step 1, then select Run comparison.
- Watch both lanes as they run. The Direct lane talks to its model connection without passing through your Fabric LLM route, so the new Fabric policy does not apply to it.
- When the Fabric lane consumes the 10,000-token budget, confirm that its next model request receives HTTP 429 — Token budget exhausted. The UI should show the rate-limit failure on the Fabric side while the Direct lane remains unaffected.
- If the first comparison does not consume the full budget, run the comparison again before the 60-second window resets.
- Compare this result with the baseline from Step 1. The agent and query are unchanged; the different Fabric outcome is caused by the gateway policy you enabled.
- Wait at least 60 seconds and try again. The Fabric lane should be allowed to send model traffic after a new rate-limit window begins.
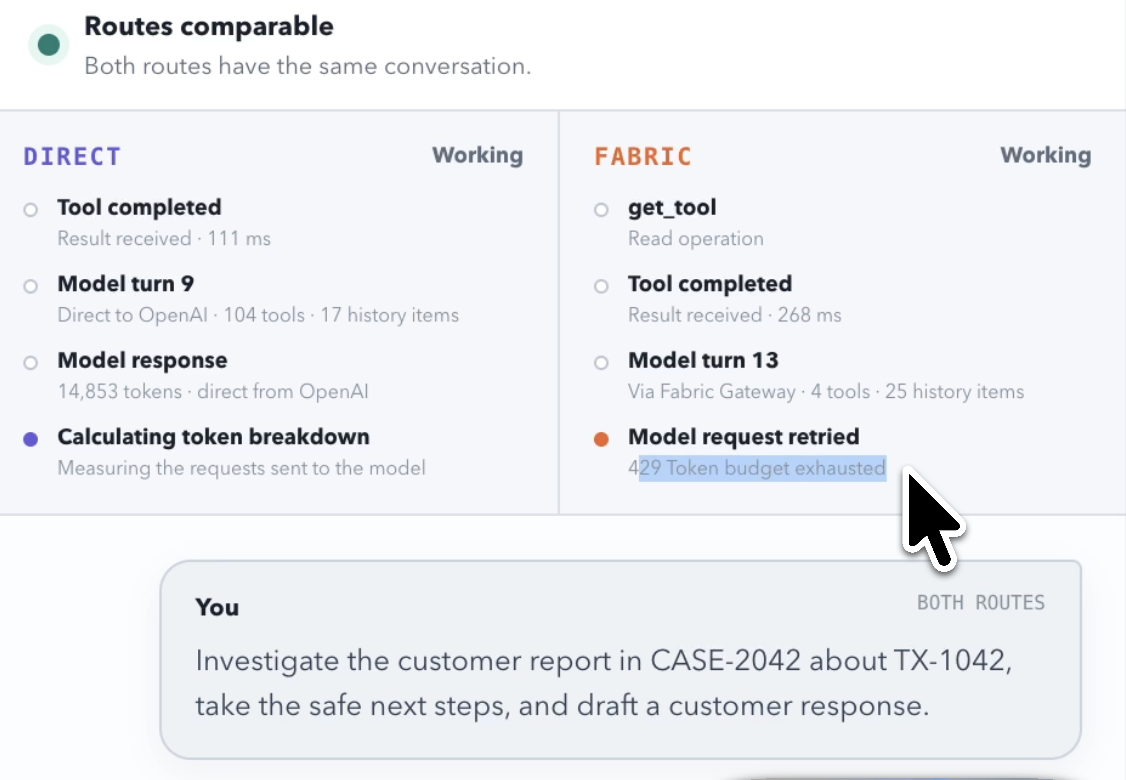
Expected outcome: The Fabric lane is stopped with a 429 when it exceeds the configured token budget. This demonstrates that Fabric can enforce governance centrally without changing the agent or model provider.
Inspect Analytics and Traces
Fabric records the traffic and policy decisions at the gateway boundary, giving you evidence of both successful and rejected requests.
-
In Fabric's sidebar, select Observability → Analytics.
-
Choose a time range that includes your comparison runs, then explore the request volume, model-token usage, latency, and error data. Look for the change created by the rate-limited Fabric request.
-
Select Observability → Traces.
-
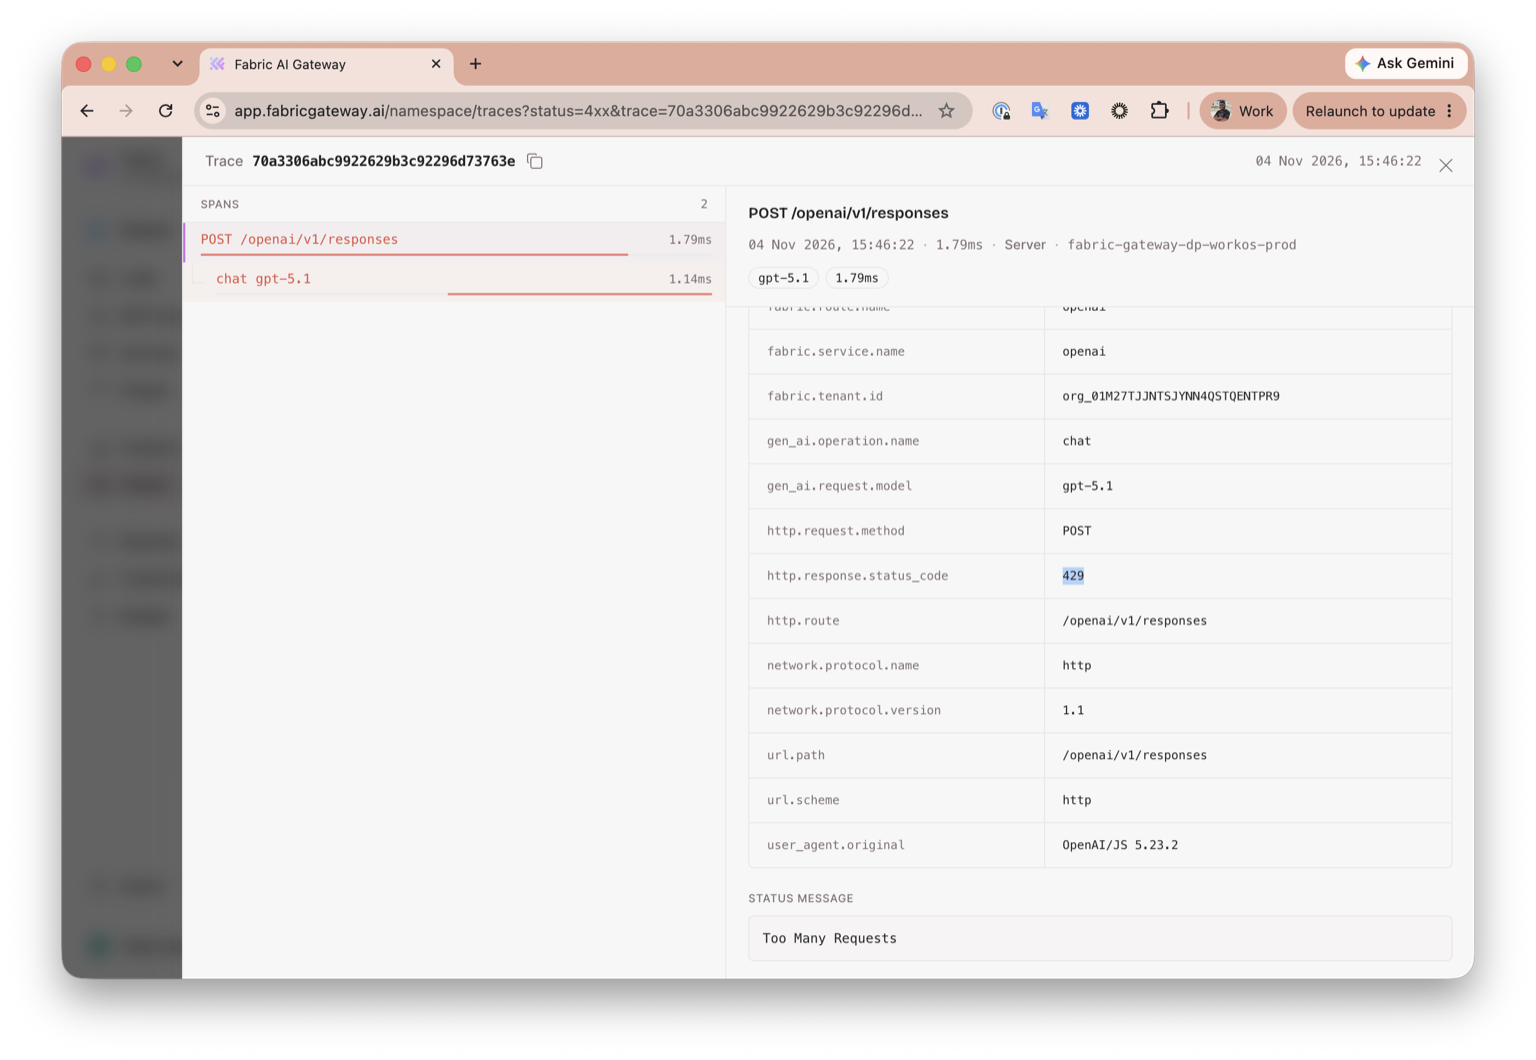
Filter the trace list to your LLM route. If available, also filter by status
429to isolate the rejected request. -
Open the rate-limited trace and inspect its timeline and metadata. Identify the LLM Rate Limit decision and where Fabric stopped the request.
-
Open a successful model trace and compare it with the rejected trace. Notice the route, status, timing, and upstream activity recorded for each outcome.
-
When you finish the exercise, disable
workshop-llm-token-limitor change it to a limit appropriate for normal use.
Expected outcome: You can use Analytics to understand aggregate usage and Traces to investigate an individual policy decision, including the enforced 429 response.
Configure Adaptive Model Routing
The rate limit controlled how much model traffic Fabric allowed. Adaptive model routing controls which model and reasoning effort handle each request. Fabric sends the prompt to a decision service first, then routes it to a model suited to the prompt's difficulty. Smaller models can handle simple requests with less latency and cost, while more capable models remain available for harder work.
For this workshop, use Jev as the decision service. Before continuing, have your Jev API key ready. Fabric stores this credential separately from your OpenAI provider key.
-
Confirm that
workshop-llm-token-limitis disabled. This prevents the temporary workshop limit from interrupting your routing comparison. -
In Fabric's sidebar, click LLMs, then click Providers.
-
Search for Jev, then click Connect.
-
Enter your Jev API key and allow the available Jev decision model.
-
Keep Create gateway route selected, reuse the gateway key you created earlier, then click Finish setup. Fabric stores the Jev credential in its managed vault.
-
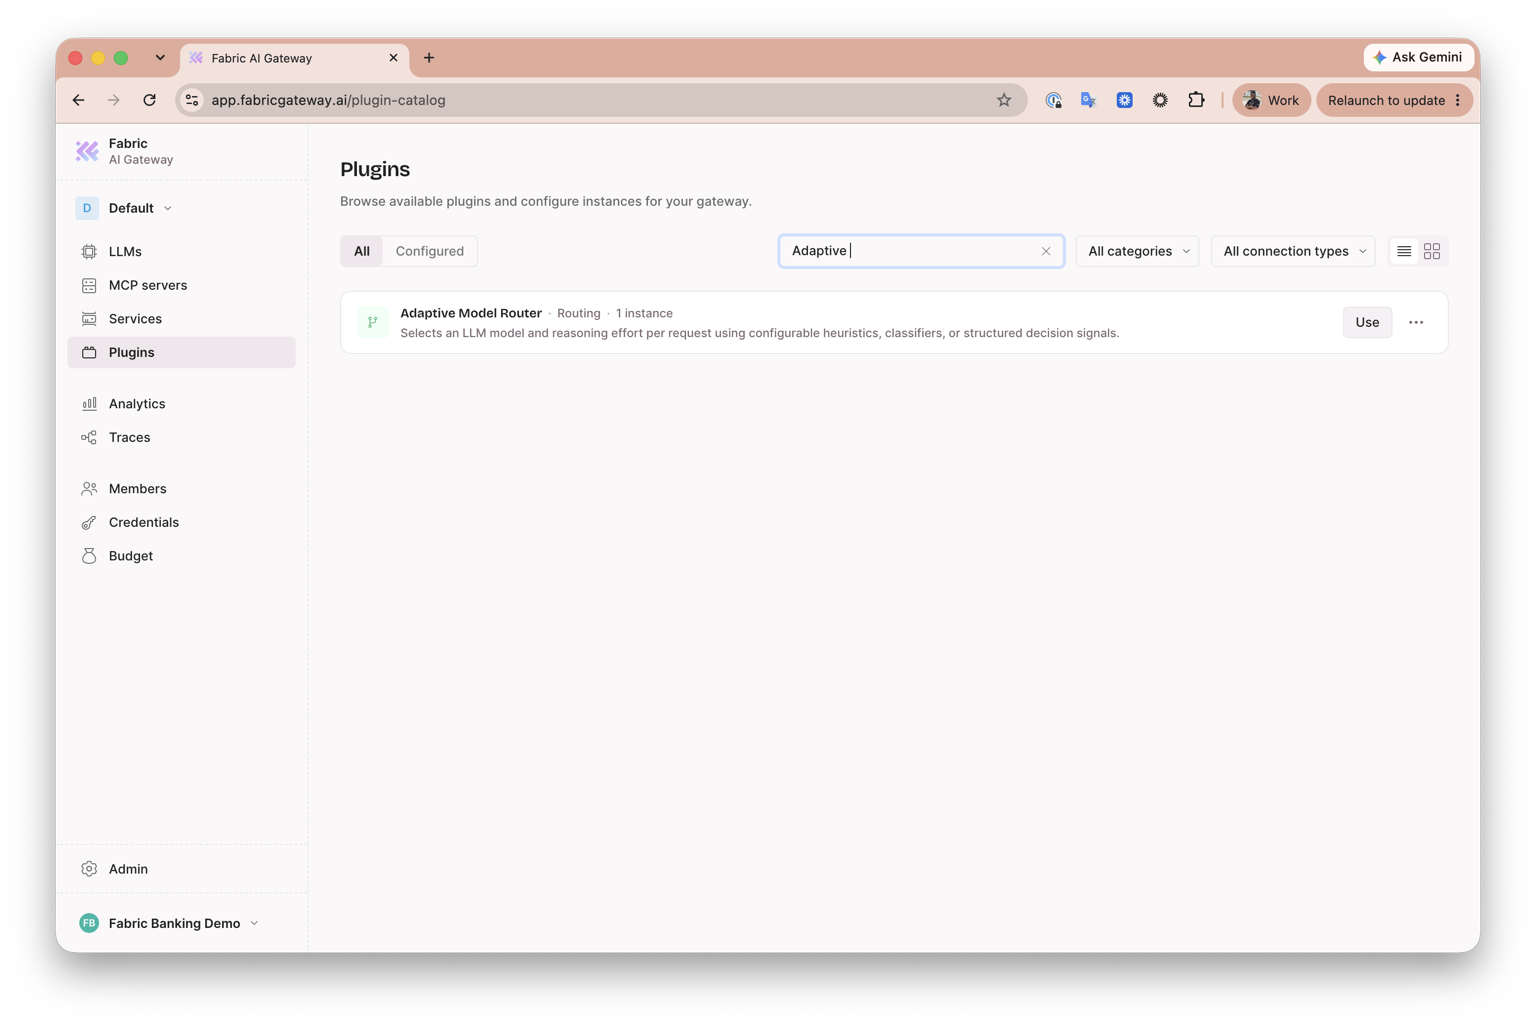
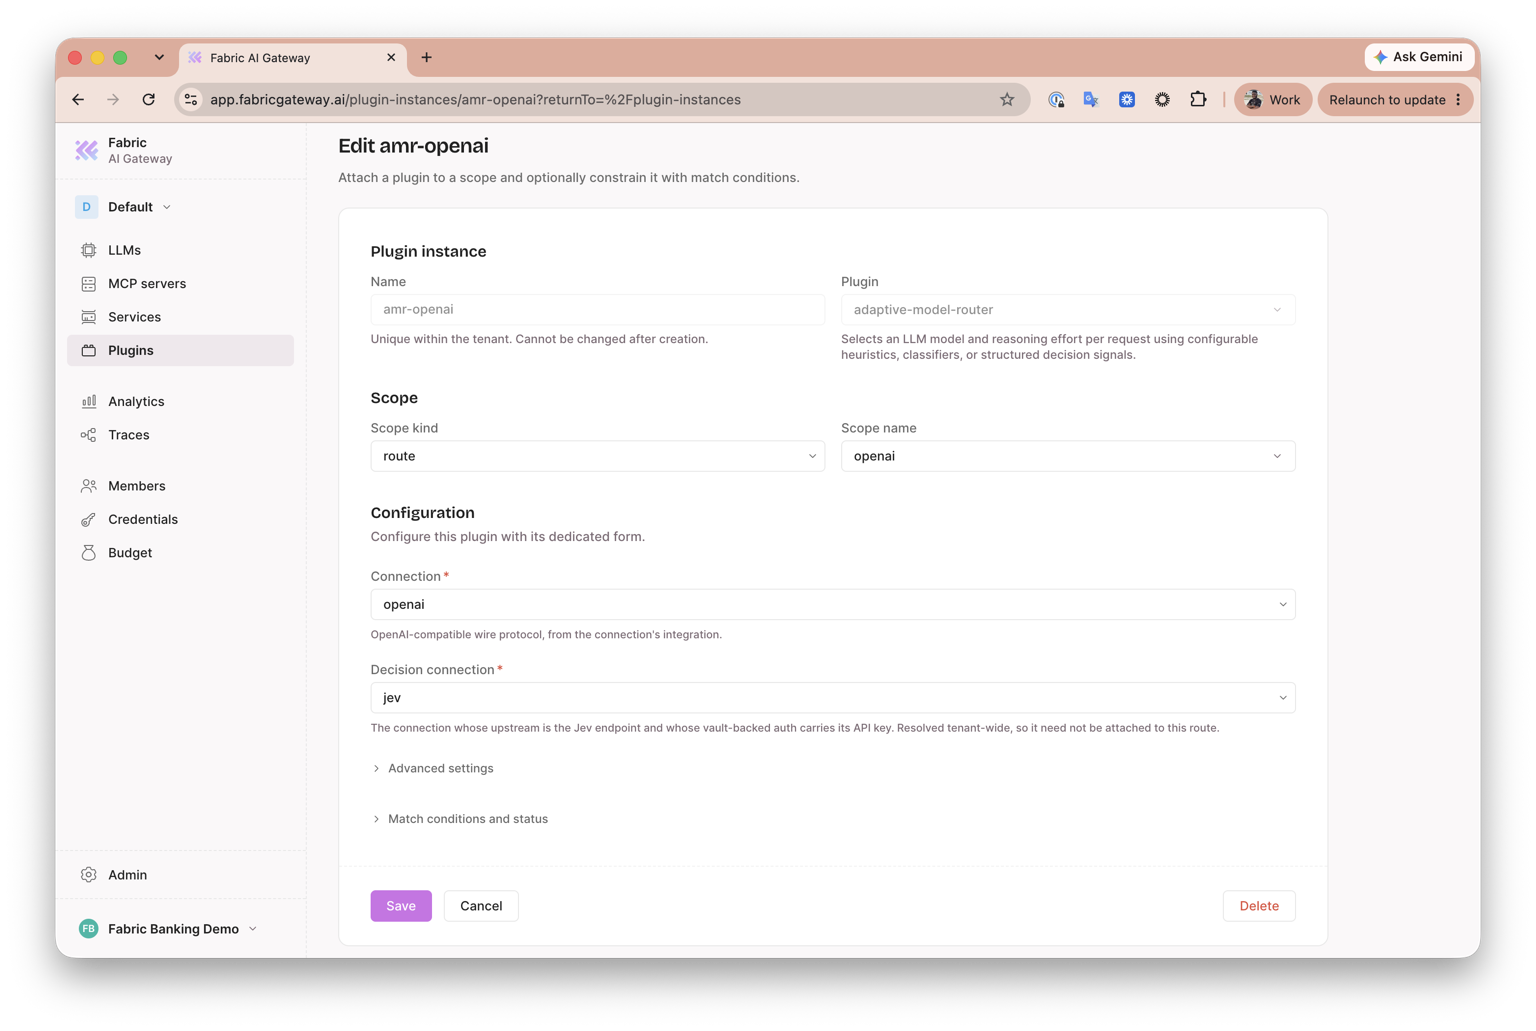
Click Plugins, filter the catalog by Routing, find Adaptive Model Router, then click Use.
-
Configure the plugin instance:
- Name:
support-agent-adaptive-router - Scope kind:
route - Scope name:
openai-route - Connection:
openai - Decision connection: select the Jev connection you created
- Name:
-
Expand Advanced settings and configure:
- Jev model: select
jev-1.13.0, or the available Jev model version shown in your connection - Max input characters:
32000 - Default max output tokens:
4096 - Session stickiness: off
- Include system messages: off
- Include tool descriptions: off
- Jev model: select
-
Click Save.
-
Return to the local support-agent UI. Run a straightforward supplied query through the Fabric lane, then run a more involved investigation query.
-
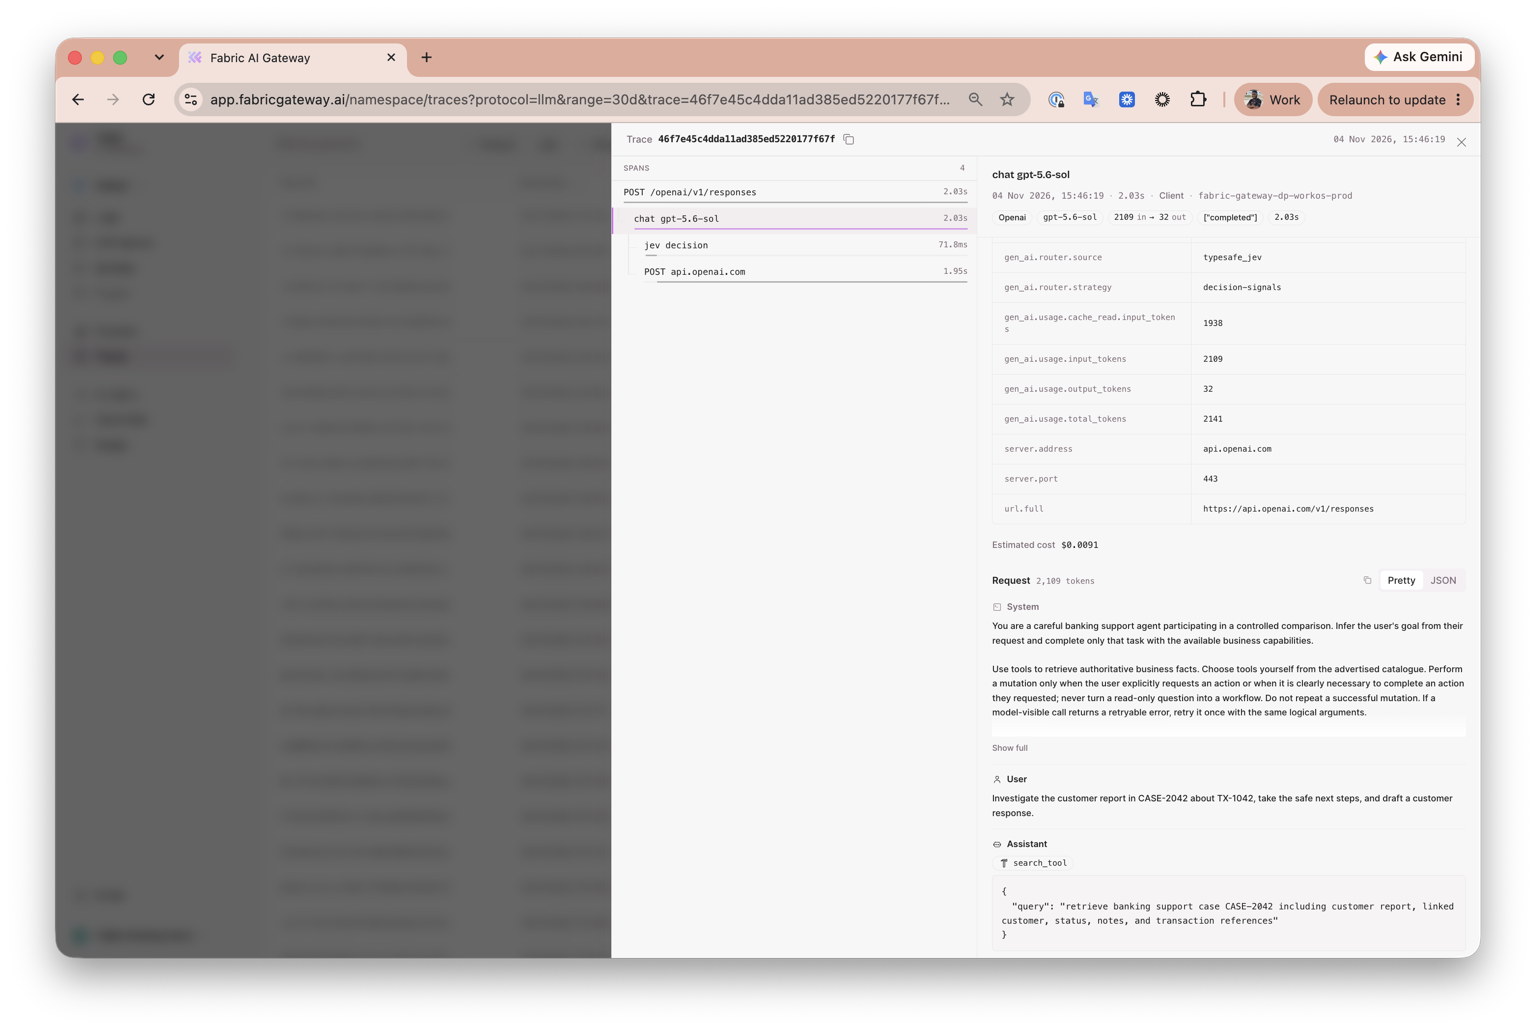
Open Traces and inspect both model requests. Confirm that each adaptive-routing trace contains a request to Jev followed by the request to the selected model provider.
-
Compare the
modelfield in the responses or trace metadata. The selected model and reasoning effort can differ because Fabric rates each prompt before sending it upstream.
Expected outcome: Fabric evaluates each prompt through the decision service and can route simple and complex support work to different model configurations without changing the support agent.
If you are stuck: Confirm that the Jev connection is available across the organization, the Adaptive Model Router is scoped to openai-route, and the route's temporary LLM Rate Limit instance is disabled.