You've sent a request. Now you'll make it reusable with variables, let Agent Mode add tests for you, and see your data come to life. Each step builds on the last — finish one before moving on.
Learn more: Variables, Agent Mode, Postman Visualizer
Store Your Destination in a Variable
Right now your country is hard-coded in the request. A variable lets you change the destination without editing the request each time. This lesson uses collection variables (scoped to the collection) rather than an environment — a different approach than in API Basics.
- In the left sidebar, click Country Dossier (the collection name itself, not a request inside it) — it opens in a tab.
- In that tab, select Variables.
- Add a variable named
country. If you don't see a Shared Value column, click the ⋯ menu at the far right of the variables table header, then under Show as column, check Shared Value. - In the Shared Value column, enter your country (e.g.
Bangladesh).

- Back in Get Country, open the Params tab. In the Query Params table, leave Key as
nameand change Value from your country (e.g.Bangladesh) to{{country}}.
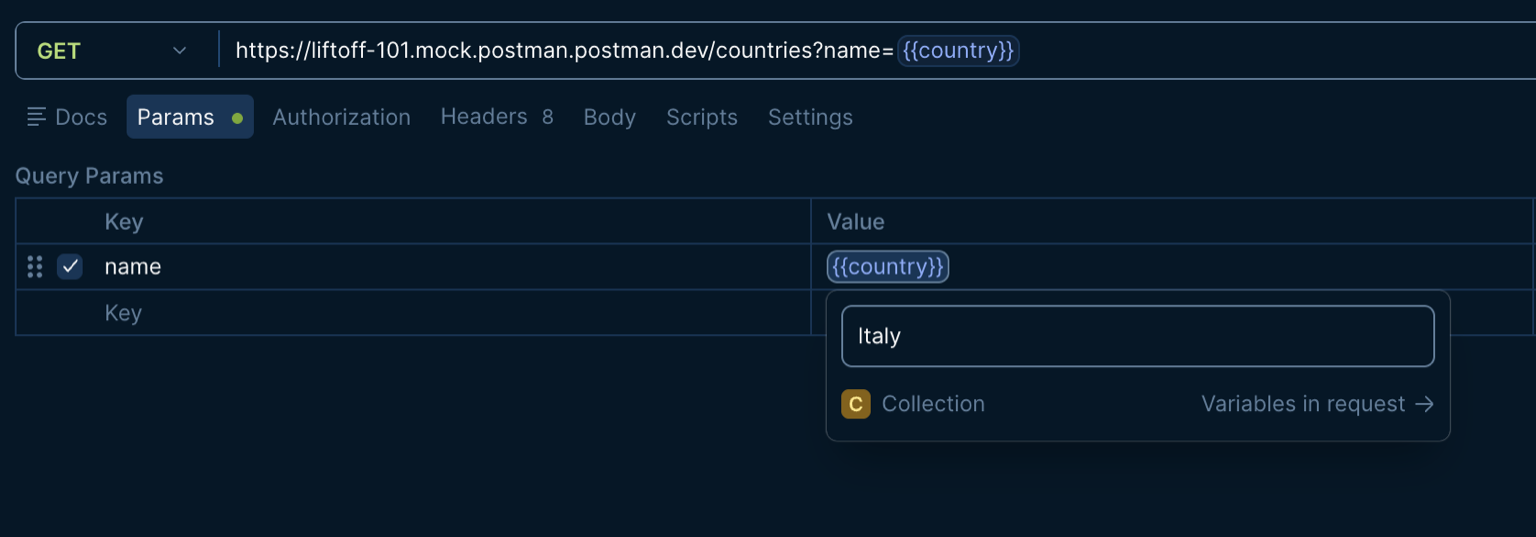
- Save the request (Ctrl/Cmd+S).
LiftOff tip: Enter your country in Shared Value, not the local Value column — LiftOff validates via the Postman API, which only sees shared values.
Let Agent Mode Be Your Guide
Tests automatically check the response when you hit Send. Agent Mode can write them for you — you review and accept.
-
Open Agent Mode from the command palette: click the universal search bar at the top, type
>to switch to commands, then type Open Agent Mode and select it. -
Give it a prompt like:
In my "Get Country" request, add a post-response test that checks the status is 200 and that the first result's
namematches mycountrycollection variable. -
Review what Agent Mode proposes. You should end up with a post-response script similar to:
pm.test("Status code is 200", function () {
    pm.response.to.have.status(200);
});

pm.test("Found my country", function () {
    const data = pm.response.json();
    pm.expect(data[0].name).to.eql(pm.collectionVariables.get("country"));
});- Accept the change and save the request.
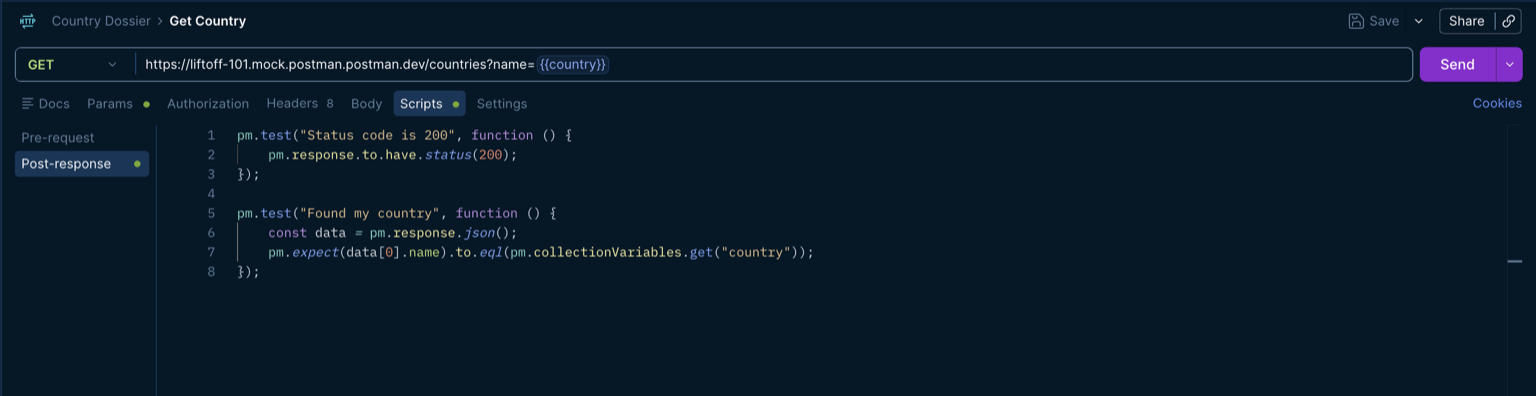
No Agent Mode available? Open Get Country, go to the Scripts tab → Post-response, and paste the script above yourself.
Stamp Your Passport
Post-response scripts run automatically after you hit Send. This one reads the response and saves the capital and currency for later. You don't need to understand every line — paste it at the bottom of your existing script.
Open Get Country → Scripts → Post-response and add this to the bottom of your existing script:
const country = pm.response.json()[0];

pm.collectionVariables.set("capital", country.capital);
pm.collectionVariables.set("currency", country.currency);

console.log(`Welcome to ${country.capital}! Don't forget some ${country.currency}.`);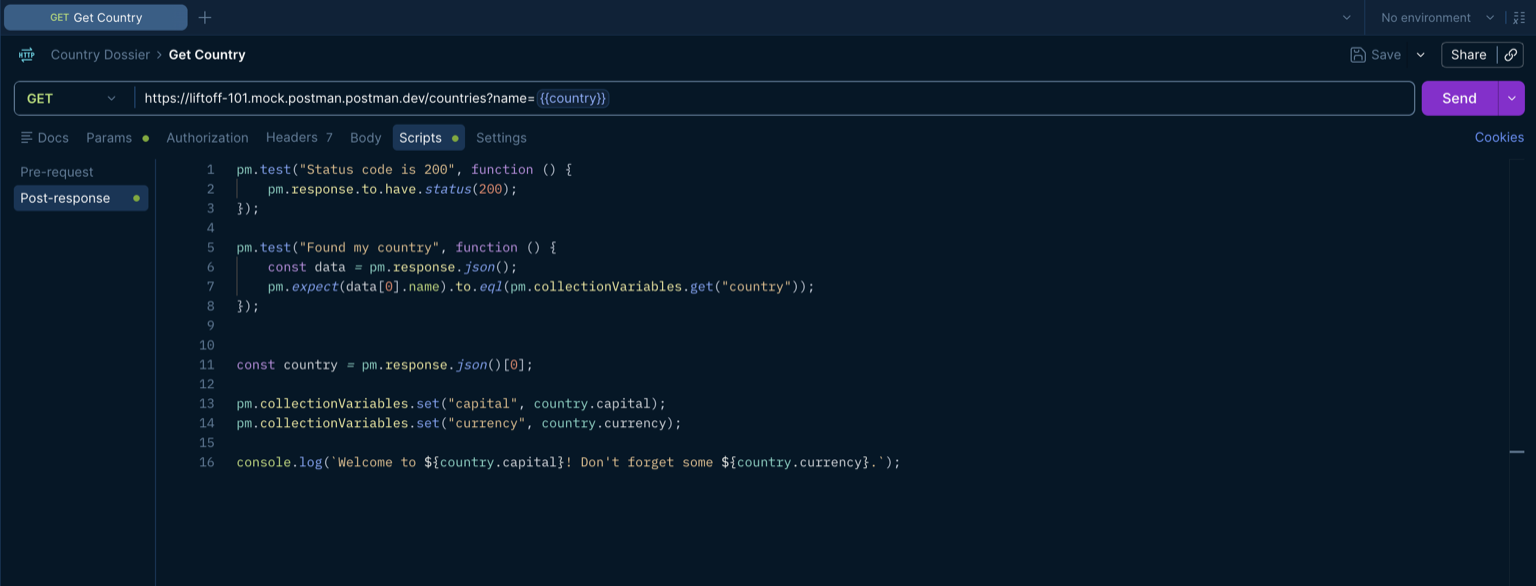
Save the request.
Turn Your Stamp Into a Visualization
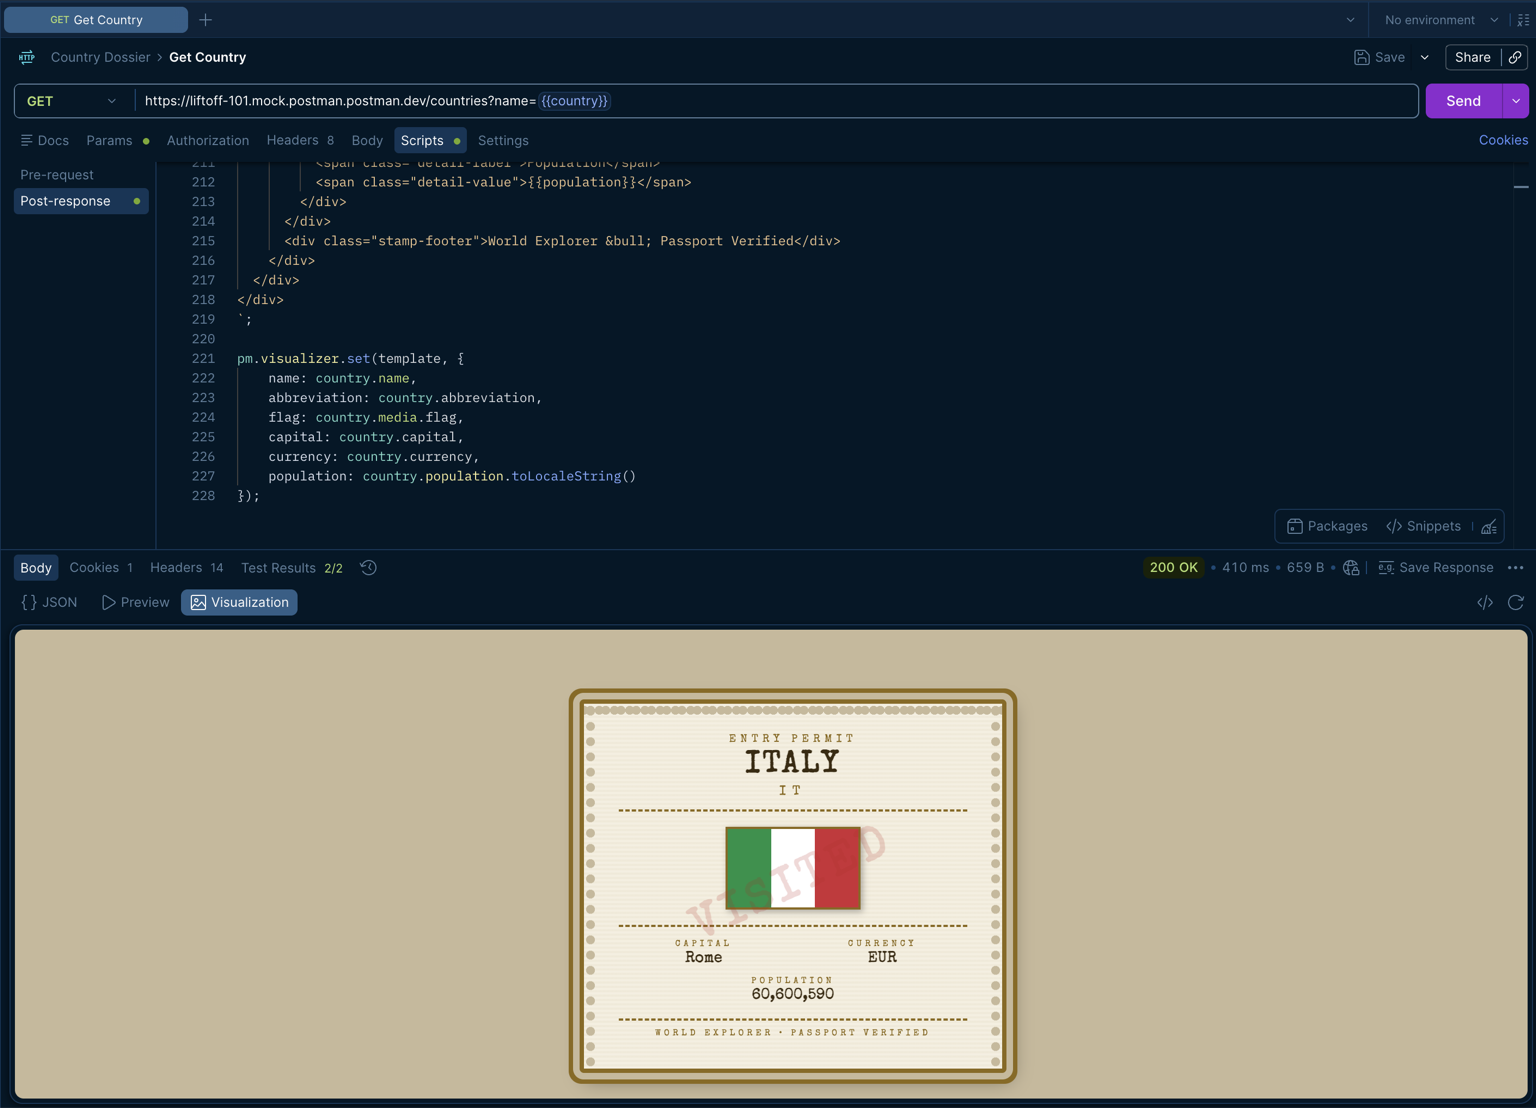
Postman can render a custom view of your response in the Visualization tab. Agent Mode will build the card — you don't need to write or understand the script yourself. See Postman Visualizer if you want to dig deeper.
-
Open Agent Mode from the right sidebar, unless it's already open.
-
Give it a prompt like:
In my "Get Country" request, add a post-response visualization using
pm.visualizer.set. Render a vintage passport-stamp style card for the first result showing the flag image (media.flag), the country name, abbreviation, capital, currency, and population. -
Review the proposed script. It should call
pm.visualizer.setwith an HTML template, similar to:
const template = `
<style>
@import url('https://fonts.googleapis.com/css2?family=Special+Elite&family=IM+Fell+English:ital@0;1&display=swap');
body {
margin: 0;
padding: 20px;
background: #c8b89a;
display: flex;
justify-content: center;
align-items: center;
min-height: 100vh;
font-family: 'Special Elite', cursive;
}
.stamp-wrapper {
position: relative;
display: inline-block;
}
.stamp {
background: #f5efe0;
border: 4px solid #8b6914;
border-radius: 4px;
padding: 28px 32px;
width: 320px;
box-shadow:
0 0 0 6px #c8b89a,
0 0 0 10px #8b6914,
4px 6px 18px rgba(0,0,0,0.45);
position: relative;
overflow: hidden;
}
/* Perforated edge effect */
.stamp::before {
content: '';
position: absolute;
top: -1px; left: -1px; right: -1px; bottom: -1px;
background:
radial-gradient(circle, #c8b89a 4px, transparent 4px) top left / 14px 14px,
radial-gradient(circle, #c8b89a 4px, transparent 4px) top right / 14px 14px,
radial-gradient(circle, #c8b89a 4px, transparent 4px) bottom left / 14px 14px,
radial-gradient(circle, #c8b89a 4px, transparent 4px) bottom right / 14px 14px;
background-repeat: repeat-x, repeat-x, repeat-y, repeat-y;
pointer-events: none;
z-index: 2;
}
/* Aged paper texture overlay */
.stamp::after {
content: '';
position: absolute;
inset: 0;
background: repeating-linear-gradient(
0deg,
transparent,
transparent 2px,
rgba(139, 105, 20, 0.04) 2px,
rgba(139, 105, 20, 0.04) 4px
);
pointer-events: none;
z-index: 1;
}
.stamp-inner {
position: relative;
z-index: 3;
}
.stamp-header {
text-align: center;
border-bottom: 2px dashed #8b6914;
padding-bottom: 10px;
margin-bottom: 14px;
}
.stamp-header .admitted {
font-size: 10px;
letter-spacing: 4px;
color: #8b6914;
text-transform: uppercase;
margin-bottom: 4px;
}
.country-name {
font-size: 28px;
font-weight: bold;
color: #3b2a0e;
letter-spacing: 2px;
text-transform: uppercase;
line-height: 1.1;
}
.abbreviation {
font-size: 12px;
letter-spacing: 6px;
color: #8b6914;
margin-top: 2px;
}
.flag-container {
text-align: center;
margin: 14px 0;
}
.flag-container img {
width: 120px;
height: 72px;
object-fit: cover;
border: 2px solid #8b6914;
box-shadow: 2px 2px 6px rgba(0,0,0,0.3);
}
.details {
border-top: 2px dashed #8b6914;
padding-top: 12px;
display: grid;
grid-template-columns: 1fr 1fr;
gap: 10px 8px;
}
.detail-item {
text-align: center;
}
.detail-label {
font-size: 8px;
letter-spacing: 3px;
color: #8b6914;
text-transform: uppercase;
display: block;
margin-bottom: 2px;
}
.detail-value {
font-size: 14px;
color: #3b2a0e;
font-weight: bold;
}
.stamp-footer {
text-align: center;
margin-top: 14px;
border-top: 2px dashed #8b6914;
padding-top: 8px;
font-size: 8px;
letter-spacing: 3px;
color: #8b6914;
text-transform: uppercase;
}
/* Red ink "VISITED" diagonal stamp */
.visited-mark {
position: absolute;
top: 50%;
left: 50%;
transform: translate(-50%, -50%) rotate(-25deg);
font-size: 42px;
font-weight: bold;
color: rgba(180, 30, 30, 0.18);
letter-spacing: 4px;
text-transform: uppercase;
pointer-events: none;
z-index: 4;
white-space: nowrap;
font-family: 'Special Elite', cursive;
}
</style>
<div class="stamp-wrapper">
<div class="stamp">
<div class="visited-mark">VISITED</div>
<div class="stamp-inner">
<div class="stamp-header">
<div class="admitted">Entry Permit</div>
<div class="country-name">{{name}}</div>
<div class="abbreviation">{{abbreviation}}</div>
</div>
<div class="flag-container">
<img src="{{flag}}" alt="Flag of {{name}}" />
</div>
<div class="details">
<div class="detail-item">
<span class="detail-label">Capital</span>
<span class="detail-value">{{capital}}</span>
</div>
<div class="detail-item">
<span class="detail-label">Currency</span>
<span class="detail-value">{{currency}}</span>
</div>
<div class="detail-item" style="grid-column: 1 / -1;">
<span class="detail-label">Population</span>
<span class="detail-value">{{population}}</span>
</div>
</div>
<div class="stamp-footer">World Explorer • Passport Verified</div>
</div>
</div>
</div>
`;
pm.visualizer.set(template, {
name: country.name,
abbreviation: country.abbreviation,
flag: country.media.flag,
capital: country.capital,
currency: country.currency,
population: country.population.toLocaleString()
});- Accept the change and save the request.
No Agent Mode available? Paste the script above at the bottom of your Post-response script yourself.
Verify the Journey
Quick end-to-end check — one Send should pass tests, show your card, and fill in your variables.
- Click Send.
- Check Test Results — both tests should pass.
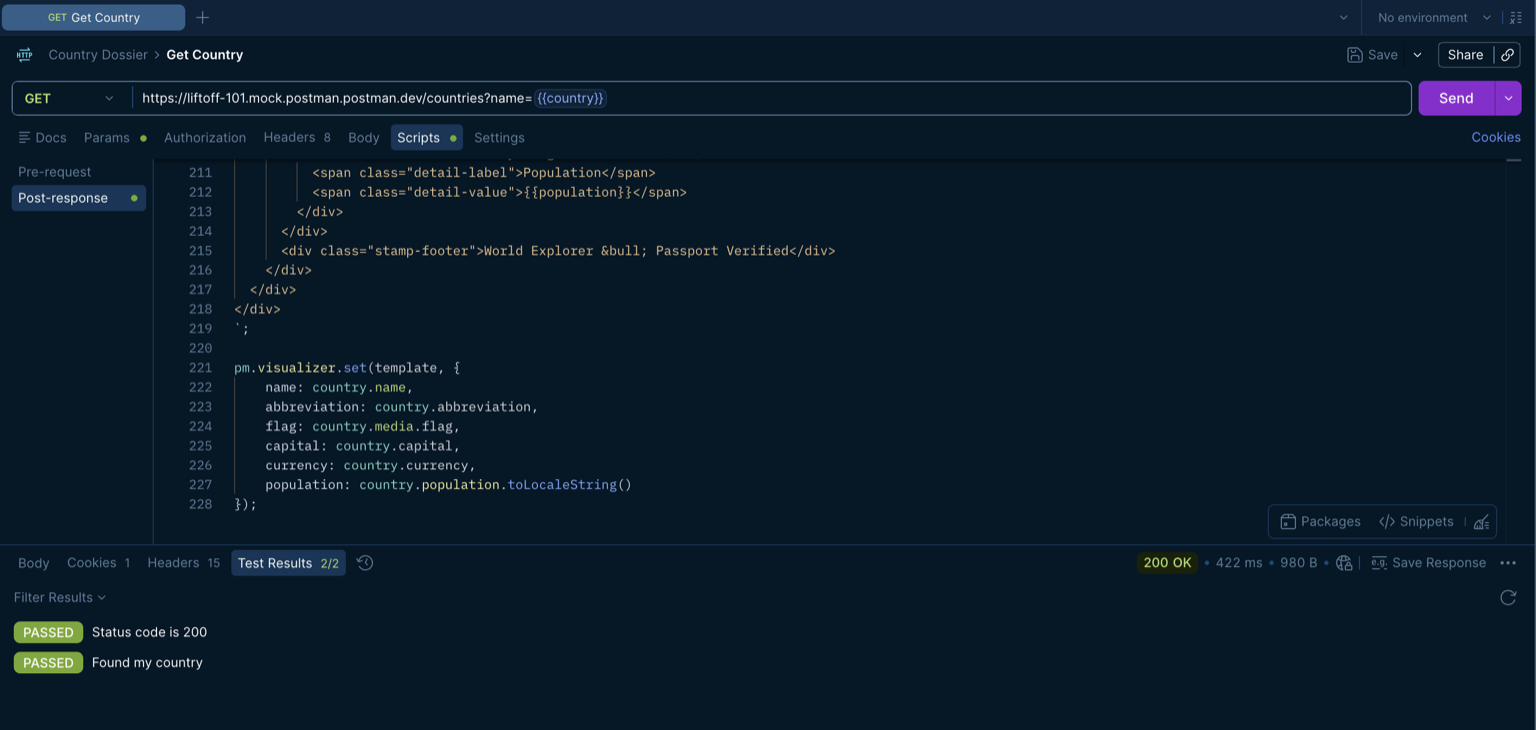
- Open the response's Visualize tab to see your passport-stamp card, flag and all.
- Open the Postman Console (bottom-left, or View → Show Postman Console) and find your
Welcome to ...message. - Pop back to the Country Dossier tab, open Variables, and confirm
capitalandcurrencynow hold values from the response.