Connect a Postman API key to check your work
You do each step in Postman, then LiftOff uses your key to look at your workspace and confirm it's done. Connect once and it works for every module. Your key is saved in this browser and is only used to check your work in Postman.
Clone the support agent application and use the prepared workshop configuration to connect its Direct lane to the deployed fintech services. Then test every upstream in Postman before adding it to Fabric.
Clone and Configure the Support Agent
-
Confirm that Node.js 20 or later and Git are installed:
node --version git --version -
Clone and enter the support agent repository:
git clone https://github.com/Postman-Devrel/Fabric-Banking-Demo.git cd Fabric-Banking-Demo -
Copy the workshop environment into the file read by the application:
cp .env.workshop .env -
Install and start the application:
npm install npm run dev -
Open
http://127.0.0.1:4173. -
Open Connections. Direct services should be ready. Fabric may remain incomplete until you add your routes.
-
Select Run Direct. Notice that only the Direct lane runs; nothing runs through Fabric Gateway yet because you have not configured your Fabric routes.
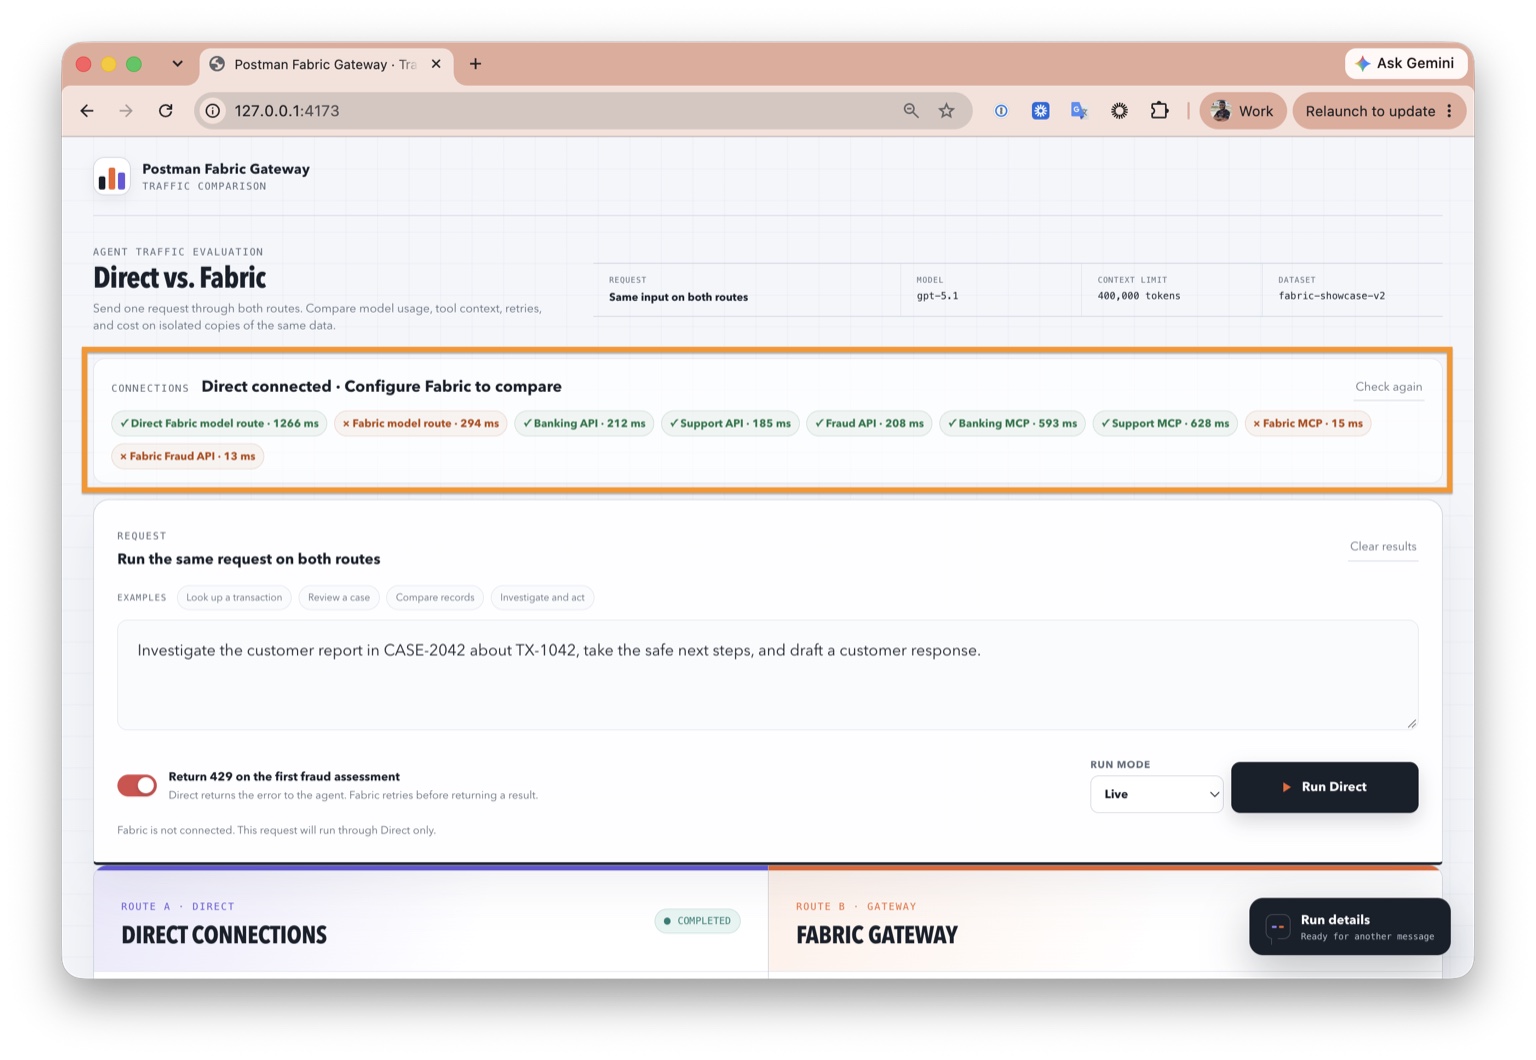
Expected outcome: The local fintech support agent starts, its preconfigured Direct services are reachable, and a run completes only in the Direct lane.
If you are stuck: Confirm that .env.workshop was copied to .env, then restart npm run dev.
Create Your Workshop Workspace
The public workspace, Workshop: Fintech Support Agent, contains the workshop resources. Use the setup button below to create a personal workspace with copies of Banking API, Fraud API, and Support API, their three OpenAPI specifications, plus one copy each of the Deployed and Fabric Gateway environments. Only the MCP collection needs to be forked manually.
- If you have not already done so, connect your Postman API key in LiftOff Settings, then return here.
- Click Create workshop workspace below. LiftOff creates the required personal workspace and imports the Banking API, Fraud API, and Support API collections, their OpenAPI specifications, plus the Deployed and Fabric Gateway environments. It does not modify your existing collections.
Set up your Postman workspace
Create your required personal workshop workspace containing three API collections, their three OpenAPI specifications, and both environments. Existing collections stay untouched. MCP is a separate manual fork.
- Personal workshop workspace
- Banking API
- Fraud API
- Support API
- Banking API specification
- Fraud API specification
- Support API specification
- Deployed environment
- Fabric Gateway environment
Nothing is created until you click Create workshop workspace.
- When all nine resources are confirmed, click View workspace. Its name follows the format Firstname - Fintech Support Agent Workshop. LiftOff remembers the confirmed workspace in this browser, so the button remains available when you return. To repeat the setup, click Create another workspace and confirm; the previous workspace remains unchanged.
Fork the MCP collection
- Open the public workspace. Under Collections, open the MCP collection's menu and select Create a fork.
- Enter a fork label, then select the workspace LiftOff just created as the destination.
- Leave Environments to fork empty. Both environments are already in your workspace; do not fork them again. Select Fork Collection.
- Return to your workspace and confirm that all four collections, all three API specifications, and exactly two environments are present. Select Deployed from Postman's environment dropdown before testing the direct services.
Expected outcome: Your workspace contains the four workshop collections, all three API specifications, and one copy each of the Deployed and Fabric Gateway environments.
Test the Deployed Services Directly in Postman
Run the supplied baseline requests in this order.
Fraud API
- Select Deployed from Postman's environment dropdown.
- Open the Fraud API collection and expand the System folder.
- Open Check Fraud API Health and select Send.
- Confirm that the health request returns a successful response.
- Open Assess TX-1042 and inspect its URL, authentication header, and JSON body.
- Select Send. Confirm that the response identifies
TX-1042and includes a risk result and recommended action.
Banking and Support MCP
Connect to the deployed Banking MCP and Support MCP servers in Postman, then test each connection and confirm that both servers return their available tools.
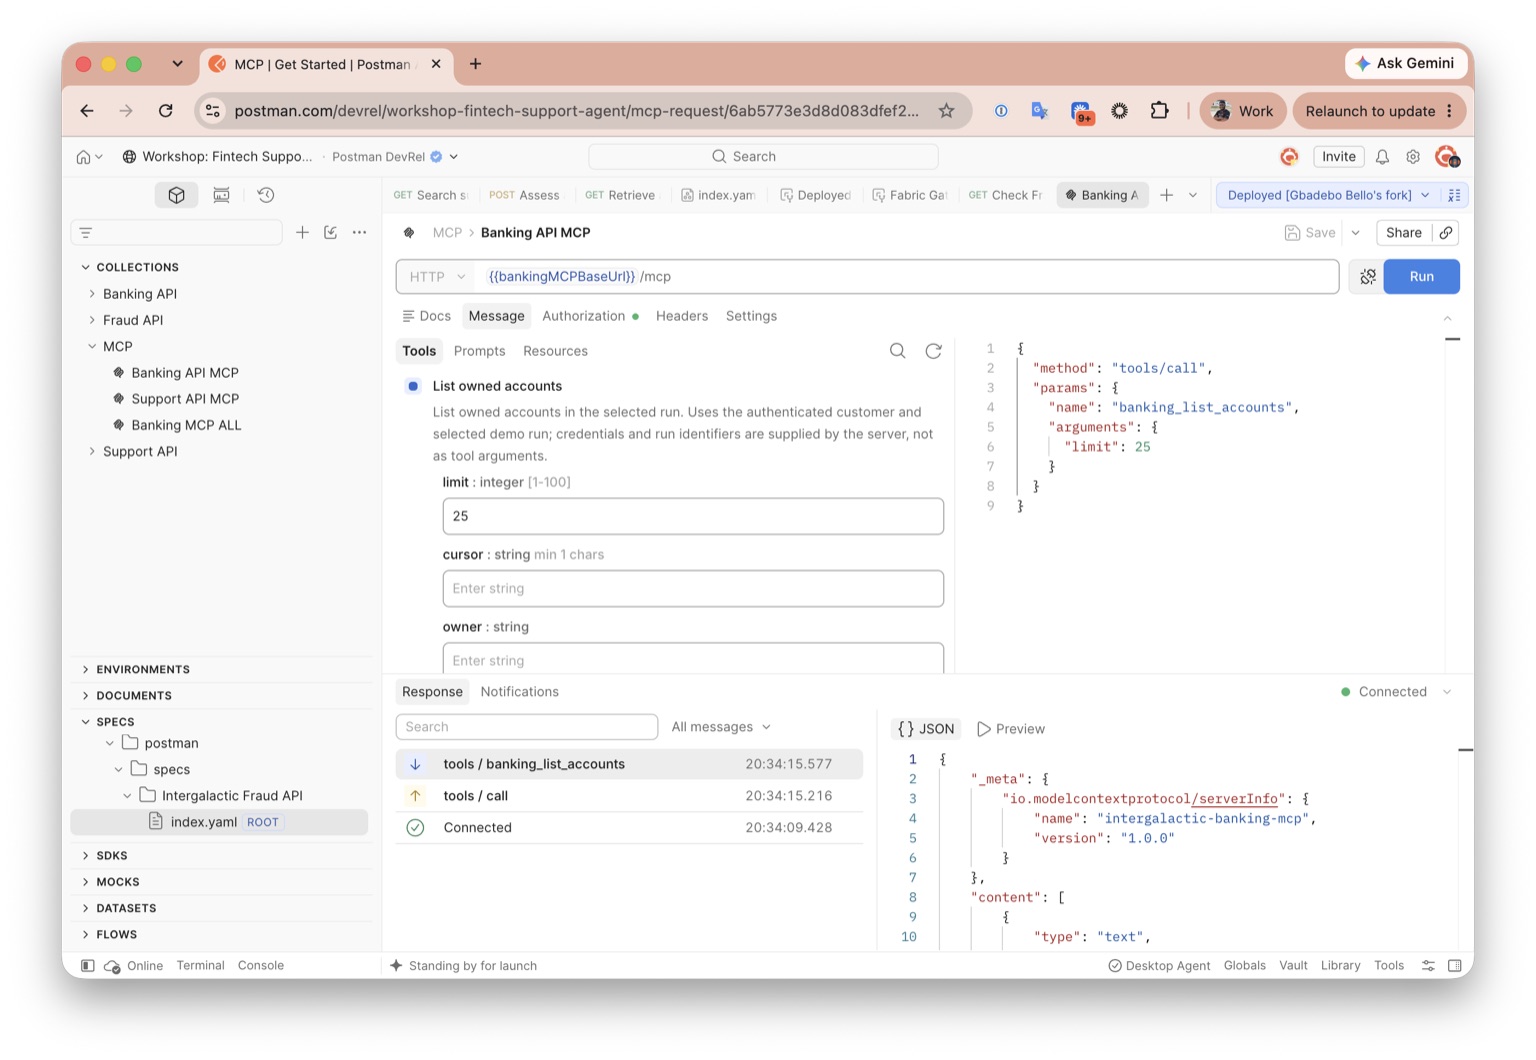
Expected outcome: Fraud, Banking MCP, and Support MCP work directly. A later failure can now be isolated to the Fabric configuration.
If you are stuck: Select the correct Postman environment and check for unresolved variables in the URL or authentication header.